You are here
- Home
- From the field to the lab – a geologist’s perspective
From the field to the lab – a geologist’s perspective
In most films, geologists are portrayed as being outdoor types who love to have a few drinks after a successful field day. It also turns out that most geologists are predominantly good guys who tend to die quite frequently in movies (https://www.earthmagazine.org/article/rock-stars-geologists-silver-screen).
In reality our mortality rate is not that high but most of us do love field work and wouldn’t say no to a beer, or two after work. Naturally, we all love to show the great pictures from the field area but there is usually a lot of (rather boring) preparation work required before we can go have a peek at rocks. Finding a good field area requires a fundamental knowledge of the geology unless you already know somebody who works there. Risk assessments must be filled out and, depending on location, some field work requires complicated logistics including helicopters, specific equipment, and camping gear.
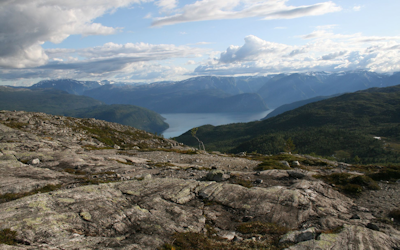
The field area presented here was relatively easy to reach: a few hours by car with food and places to stay nearby and then roughly an hour to hike up to the area of interest itself. The reward for the hike was this spectacular view of the Sognefjord in western Norway.
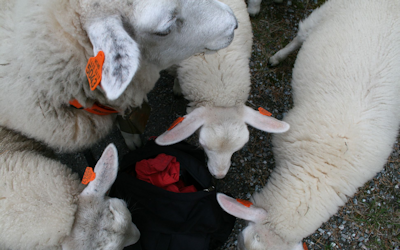
We hiked up to the area for several days and one time we got unexpected help from these curious individuals:
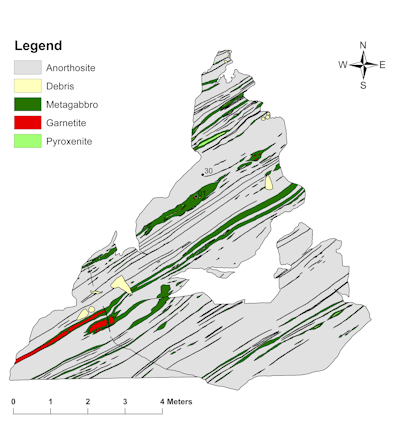
The rocks we were interested in, are called layered anorthosites, with the grey areas being the anorthosite named after Ca-rich plagioclase (unrelated side-note: anorthosites can also be found on the Moon), and the dark layers consisting of more Mg-and Fe-rich minerals (metagrabbro). We wanted to understand the heterogeneity of the rocks and therefore some detailed mapping was required. First, we constructed a grid with 1 by 1 meter quadrangles as shown in the picture below.
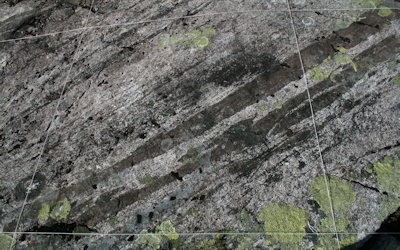
Then, we sketched the units in each quadrangle and repeated this ~ 70 times, which was sometimes difficult since the rocks were obscured by lichen, rubble, and other plants.
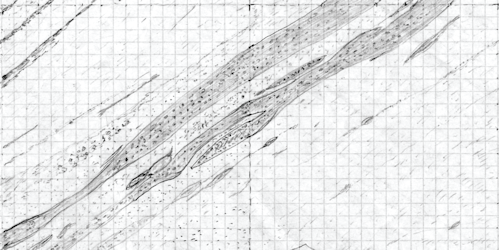
Later, these sketches were scanned, put together, redrawn and referenced resulting in the following map:
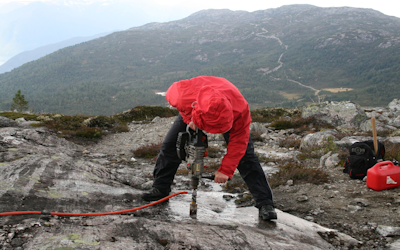
In addition to mapping, we also wanted to take samples home to study the mineralogy and to analyze the geochemistry. For this, we carried a core drill up to the mountain just to notice that the drill bit was so worn that it would not drill into the rock. We had no other choice than to come back another day for a drilling session as shown by the picture below where the writer of this post is trying to keep her balance.
Once back in the lab, some of the cores were crushed to a powder to make them suitable for geochemical analyses. Thin sections, ~ 30 µm thin slices of rocks, were prepared, which allow to study the minerals in detail under the microscope and to obtain mineral compositions by using analytical instrumentation.


Author:
Dr Julia Semprich
is a Research Fellow
in the School of Environment, Earth and Ecosystems Sciences at the Open University


Explore

Undergraduate
Postgraduate
Policy
-
Follow us on Social media
-


